Toyota JZX90 Drift Mod in FR Legends – Tuning Tips & Performance Review
The Toyota JZX90 earned a reputation for strong torque and a balanced chassis. Classic JDM sedan style appeals broadly.
FR Legends mod builds favor the JZX90 for good reasons. Stable platform rewards proper tuning dramatically.
What this guide covers
Best tuning setup: Proven configurations that work across skill levels. Not random guessing. Tested approaches.
Grip versus slide balance: Exact tire settings creating controllable oversteer. Front-rear ratios that actually function.
Performance review: Honest assessment of strengths and limitations. Where JZX90 excels. Where it struggles.
Mistakes to avoid: Common errors ruining otherwise good builds. Problems seen repeatedly with this chassis.
Also Read: https://lightyellow-spider-387051.hostingersite.com/nissan-370z/
Why the Toyota JZX90 Is a Strong Drift Platform in FR Legends
Several characteristics make this platform work well for drifting.
Balanced weight distribution: A near 50-50 split creates a neutral handling baseline. The car does not naturally oversteer or understeer dramatically. You control behavior through inputs.
Strong mid-range power: Torque arrives early and sustains through rev range. You maintain an angle without constant high RPM. Forgiving powerband suits varied skill levels.
Stable transitions: Longer wheelbase compared to compact platforms. Direction changes happen smoothly instead of twitchily. Flow improves naturally.
Good for both touge and circuits: Versatility across track types. Technical mountain passes work. High-speed circuits work. Adaptability matters.
Works well in mod versions: The chassis accepts tuning changes predictably. Setup adjustments affect handling as expected. No bizarre physics quirks fighting you constantly.
Stock Feel vs Tuned Performance
Stock setup provides a baseline experience. Tuning transforms the capability completely.
How the JZX90 behaves without tuning:
Moderate power feels adequate initially. Handling stays neutral and predictable. But lacks angle authority for high scores. Exit speed suffers in competitive situations.
Stock settings work for learning basics. Understanding weight transfer fundamentals. But progression stalls without optimization.
What changes after proper setup:
Entry angle: Increases significantly with correct suspension and grip balance. You initiate steeper without losing control. Scoring potential rises immediately.
Stability: Improves paradoxically despite a more aggressive setup. Proper tuning creates predictable behavior. You trust the car through sections.
Exit speed: Gear ratio optimization maintains powerband access. You accelerate cleanly out of corners. Momentum carries into the next section effectively.
Drift smoothness: Transitions become smooth rather than choppy. The car naturally settles between direction changes. Overall experience transforms completely.
Also Read: https://lightyellow-spider-387051.hostingersite.com/perfect-drift-car/
Recommended Engine Setup for Toyota JZX90
Power determines which techniques work and which overwhelm control.
Ideal Horsepower Range
380 to 450 HP for smooth drifting:
This range provides adequate angle authority without excessive sensitivity. Throttle errors stay correctable. You learn proper modulation without constant spinning.
Good balance between capability and forgiveness. Intermediate players thrive here. Advanced players use this for consistency-focused runs.
450 to 550 HP for aggressive style:
Higher power enables steeper sustained angles. Long sweepers become easier. But throttle discipline must already be solid.
One mistake and you are spinning. No middle ground at this power level. Only attempt after mastering moderate builds thoroughly.
Turbo Setup vs Balanced Build
Turbo for long tracks:
Boost provides extra power when needed on extended sections. You control output through throttle position. Flexibility helps with varied layouts.
Slight lag can help, actually. A brief delay between input and response gives reaction time. Some players prefer this characteristic.
Balanced build for control-focused drifting:
Natural aspiration delivers instant throttle response. No lag means immediate feedback. Better for technical tracks that demand precise timing.
Simpler tuning with fewer variables. Power delivery stays completely predictable. Good for learning advanced techniques systematically.
RPM and Gear Considerations
Medium gear ratios:
Second gear should typically cover a 40-80 kph range. This handles most drift speeds without shifting mid-section. Flow maintains better.
Third gear for faster sweepers and transitions. Rarely need fourth on pure drift sections.
Avoid very short gearing on mountain tracks:
Hitting rev limiter mid-corner kills momentum. You either shift awkwardly or lift the throttle. Both break rhythm completely.
Short gears work on tight circuits. Continuous touge corners require longer ratios to maintain powerband access throughout.
Suspension Settings for Stable Drifting
Suspension determines weight transfer behavior and response characteristics.
Front Camber & Rear Camber
Moderate front camber:
-2.0 to -2.5 degrees works broadly. Sharpens turn-in without making steering nervous. You point accurately without twitchiness.
More negative camber helps if understeer develops. But rarely need beyond -3.0 degrees on the JZX90 chassis.
Slight rear camber for angle support:
-1.5 to -2.0 degrees rear creates predictable slide initiation. Too many snaps into oversteer harshly. Too little prevents adequate rotation.
The balance point varies slightly by driving style. Test incrementally to find personal preference.
Toe Settings
Slight front toe-out:
0.1 to 0.2 degrees out improves turn-in response. The car rotates more willingly on entry. But excessive toe creates instability.
Zero toe works fine, too. Preference over necessity here.
Rear neutral or slight toe-in for stability:
Zero toe rear provides neutral behavior. Slight toe-in (0.1 degrees) adds stability during transitions. Helps if the car feels loose.
Avoid toe-out rear. Creates unpredictable behavior and unstable feelings throughout corners.
Ride Height
Slightly lowered:
Medium-low ride height reduces body roll moderately. Sharpens response without eliminating weight transfer completely. Good compromise position.
Avoid extreme drops that reduce control:
Slamming suspension fully eliminates useful weight transfer. Rotation suffers. The car feels dead and unresponsive through initiation.
Keep some suspension travel available. Physics needs movement to work properly.
Best Tire Grip Setup – Balance Over Chaos
Tire grip controls fundamental drift behavior more than any other setting.
Front Grip Recommendation
Medium-high grip for steering precision:
65-70% front grip provides confident turn-in. You point accurately without understeer concerns. Steering input reliably translates into a direction change.
Higher grip helps beginners build confidence. Lower grip makes the car feel vague and imprecise. Stay in the recommended range.
Rear Grip Recommendation
Slightly lower grip for controlled slides:
50-55% rear grip creates manageable oversteer. The car rotates willingly without snapping unpredictably. Throttle control remains progressive rather than binary.
Balance with the front grip determines overall behavior. Keep the front 10-15% higher than the rear, typically.
When to Increase Rear Grip
Multiplayer battles:
Tandem runs demand consistency over playfulness. Slightly higher rear grip (55-60%) keeps you stable while following or leading. Predictability wins battles.
Proximity runs:
Drifting close to walls with a loose setup risks contact. Adding a rear grip provides margin for error. You focus on the line rather than on preventing spinning.
Similar principles apply across different platforms. Testing new cars requires the same systematic grip-balancing approach. Fundamentals transfer universally.
Track Performance – Where JZX90 Performs Best
Different tracks highlight different chassis strengths.
Suzuka (flow stability): Long sweepers reward a stable platform. JZX90 maintains a consistent angle through extended sections. Smooth power delivery shines here.
Tsukuba (technical control): Precise steering response handles tight technical sections well. The balanced chassis effectively adapts to varied corner types. Good benchmark track.
Hakone/Touge maps (smooth downhill balance): Weight distribution helps downhill stability. The car does not become excessively front-heavy. Throttle control stays manageable throughout descents.
Drift Playground (angle practice): Open space lets you explore limits safely. Good for testing setups and learning maximum angle capability without track pressure.
Driving Style That Fits the JZX90 Best
Chassis characteristics favor specific techniques over others.
Smooth throttle input:
Progressive power application works better than aggressive jabbing. Car responds to gradual changes more predictably. Harshness upsets balance unnecessarily.
Controlled entry, not aggressive flick:
Weight transfer initiation suits JZX90 better than harsh flick entries. The chassis rotates adequately without violence. Smoothness produces better results.
Long sustained drifts:
Platform excels at maintaining angle through extended sections. Stable characteristics enable consistency. Short choppy drifts waste the chassis strengths.
Consistent angle over extreme angle:
Moderate sustainable angle scores better than maximum unsustainable angle. JZX90 rewards consistency and flow. Flash hurts more than helps here.
Even visual customization, such as livery codes, should match this smooth, professional aesthetic. Clean builds suit the chassis character better than aggressive styling.
Common Tuning Mistakes With JZX90
Repeated errors ruin otherwise capable builds.
Too much horsepower: Adding maximum power before technique justifies it. The stable chassis masks problems initially. But scores suffer from inconsistency ultimately.
Over-lowering suspension: Thinking lower always equals better. Actually kills the weight transfer needed for smooth rotation. The car feels dead instead of responsive.
Too low rear grip: Running extremely loose because it seems easier. Creates unpredictable behavior and impossible consistency. Moderate grip works better.
Incorrect gear spacing: Keeping stock ratios after power upgrades. You drop out of powerband mid-drift. Throttle response dies when needed most.
Ignoring track type: Using the same setup everywhere. Technical tracks need a different approach than high-speed circuits. Adapt or struggle unnecessarily.
Quick Toyota JZX90 Drift Setup (Copy & Test)
Balanced Control Build:
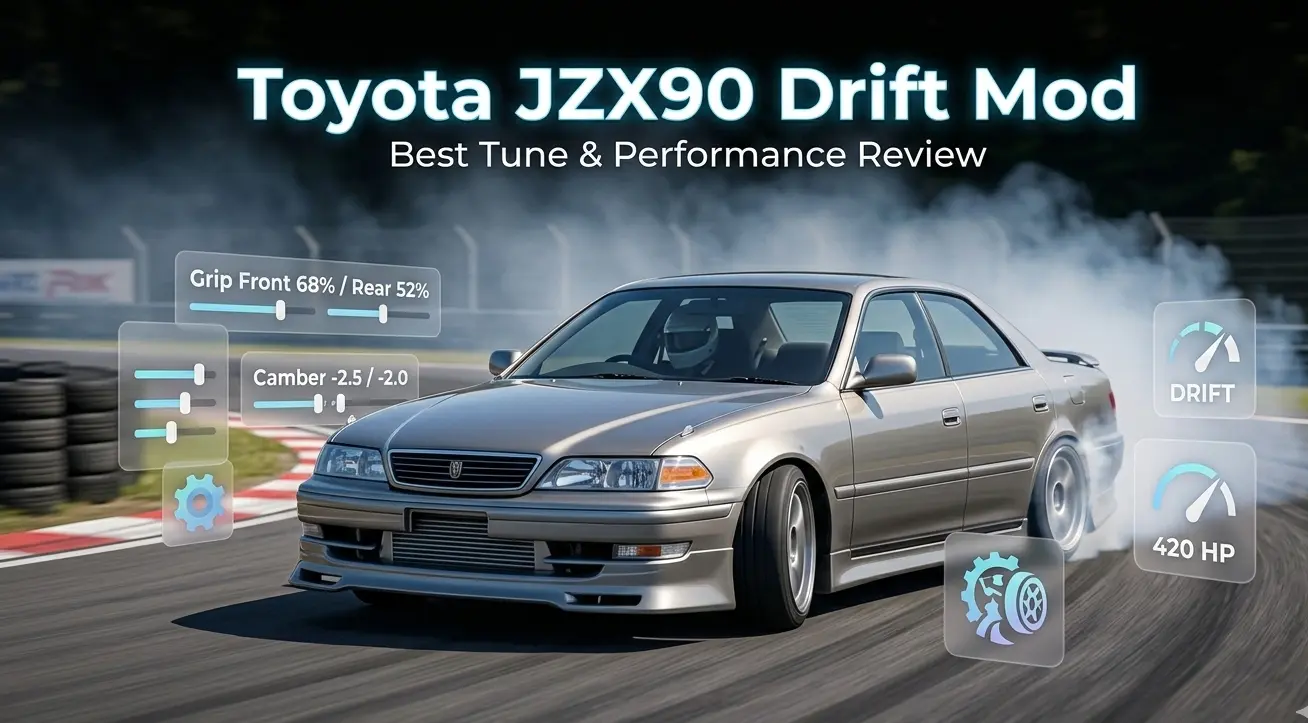
Power: 420 HP Front Grip: 68% Rear Grip: 52% Front Camber: -2.5 degrees Rear Camber: -2.0 degrees Gear Ratio: Medium
This configuration works for intermediate players across most tracks. Adjust based on personal throttle sensitivity after testing thoroughly.
The base FR Legends physics apply here. Even when FR Legends 2 arrives, these fundamental tuning principles will remain relevant. Core physics stays consistent.
Is the Toyota JZX90 Better Than the Nissan 370Z?
Different strengths serve different players and situations.
370Z equals more aggressive:
Sharper steering response. Quicker direction changes. Higher skill ceiling for advanced players. But less forgiving of mistakes.
JZX90 equals smoother and more stable:
Longer wheelbase creates a flowing feel. More forgiving throttle response. Better for consistency-focused driving. But slightly lower ultimate performance ceiling.
Which suits which player type:
Intermediate players wanting consistency choose JZX90. Advanced players chasing maximum scores choose 370Z. Beginners should start elsewhere entirely before either.
Track type matters too. Technical sections favor the 370Z’s agility. Long flowing sections favor JZX90 stability. Neither dominates everywhere.
The Supra mod offers a third alternative entirely. More power, different character. Each chassis serves distinct purposes effectively.
Final Performance Review – Is JZX90 Worth Building?
Value depends on experience level and driving style preferences.
Great for intermediate players:
You have solid fundamentals, but want consistent high scores. JZX90 provides a platform enabling improvement. Stable enough to build confidence. Capable enough to challenge skills.
Stable in multiplayer:
Tandem battles reward predictability over flash. JZX90 delivers exactly this. You follow or lead smoothly without drama. Consistency wins competitions.
Not ideal for beginners who struggle with throttle control:
Despite forgiving nature, still demands basic throttle discipline. True beginners benefit from lighter platforms teaching fundamentals first. Graduate to JZX90 after the basics solidify.
Worth building absolutely if intermediate or above. One of the better all-around drift platforms available in mods.
FAQ’s:
What HP is best for JZX90?
420-450 HP for balanced control and consistency. 380-400 HP for initial chassis learning. 480-520 HP for aggressive angle-focused driving after mastering moderate power. Avoid exceeding 550 HP unless throttle discipline is exceptional.
Is JZX90 good for beginners?
Better for intermediate players. Beginners benefit from lighter platforms like AE86 first. JZX90 assumes a basic understanding of throttle control and weight transfer exists. Not the hardest learning platform, but not the easiest either.
Which track suits it most?
Suzuka for flow stability. Long sweepers highlight chassis strengths. Hakone-style touge maps work well because of their balanced downhill behavior. Tsukuba is good for technical practice. Versatile across track types generally.
Does it work better in mod versions?
Yes significantly. The stock game lacks JZX90 entirely. Mod versions provide proper implementation with accurate physics. Quality varies between mod sources, though. Choose established mod packs for the best experience.
Is JZX90 stable in multiplayer battles?
Very stable for tandem runs. Predictable behavior helps match opponent movements. Neither too twitchy nor too slow responding. Good middle ground for competitive drift battles. Consistency advantage over flashier but unstable alternatives.